Our family is like a tale of two nutrition stories. Maybe you can relate!
We have one child who is a fantastic eater is the first person to hit the veggie tray at every. single. birthday party.
My other son is so picky, we tell him that pizza sauce is “Italian Catsup” so he eats pizza with sauce on it. Because, you know, it’s like… made from tomatoes. And that’s a vegetable.
But one thing about all kids, is they love it when something is “theirs.” Add an initial or name on it, and that’s a big deal. So for us, having a special smoothie cup for each of my children has helped tremendously in making sure every single morning smoothie is fully consumed.
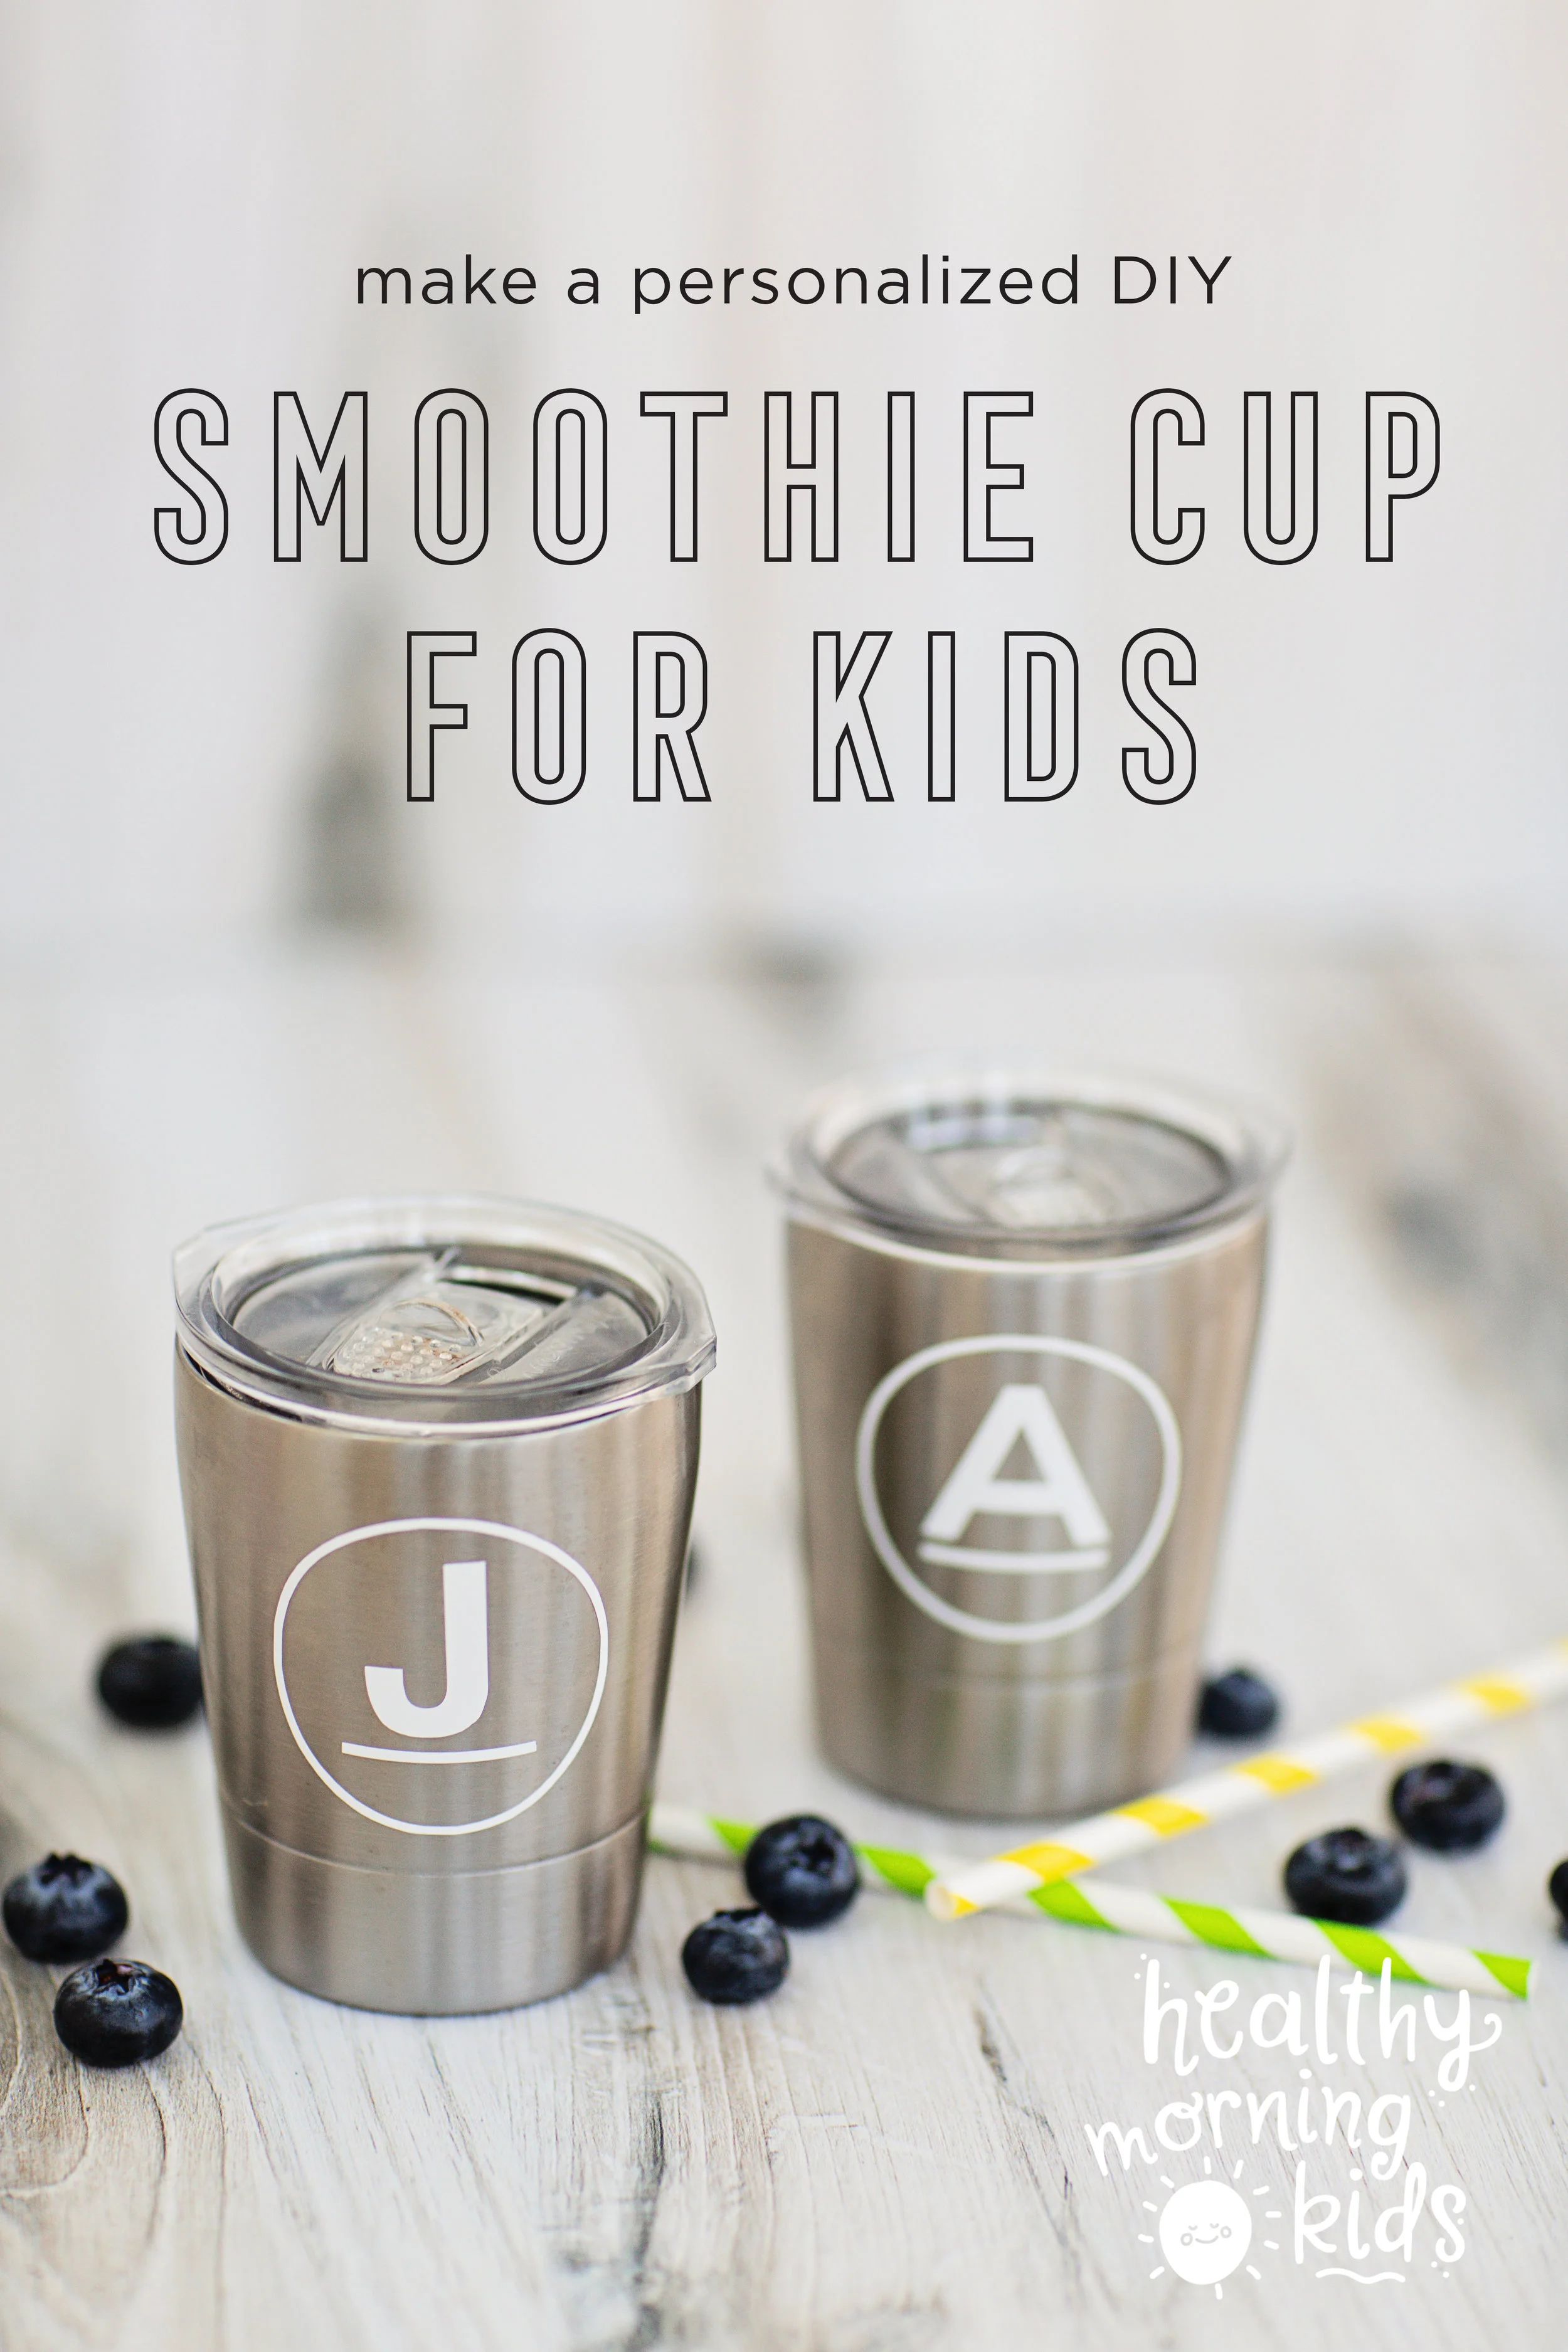
To start, I purchased two of these cups with special straws for each of our boys. We used them for a while, and they became a daily favorite for our morning breakfast smoothies.

Then one day I got a creative bug and decided to monogram them with decals using my Cricut. It took about 45 minutes from start to finish, and the boys absolutely LOVE their special smoothie cups. Well worth the time!
What you’ll need:
Smoothie cups like the one above
Photoshop or a similar text editing software
A Cricut, Silhouette or a friend with one :)
Permanent vinyl in the color you’d like to use. Here’s the link to white.
Transfer tape.
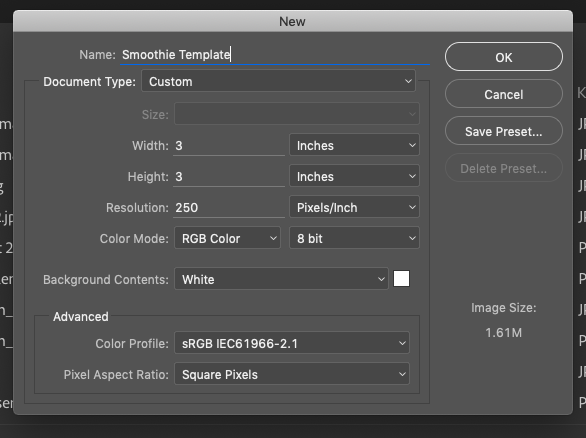
The first step is in Photoshop! If you don’t have Photoshop, you can easily do this in any graphics software.
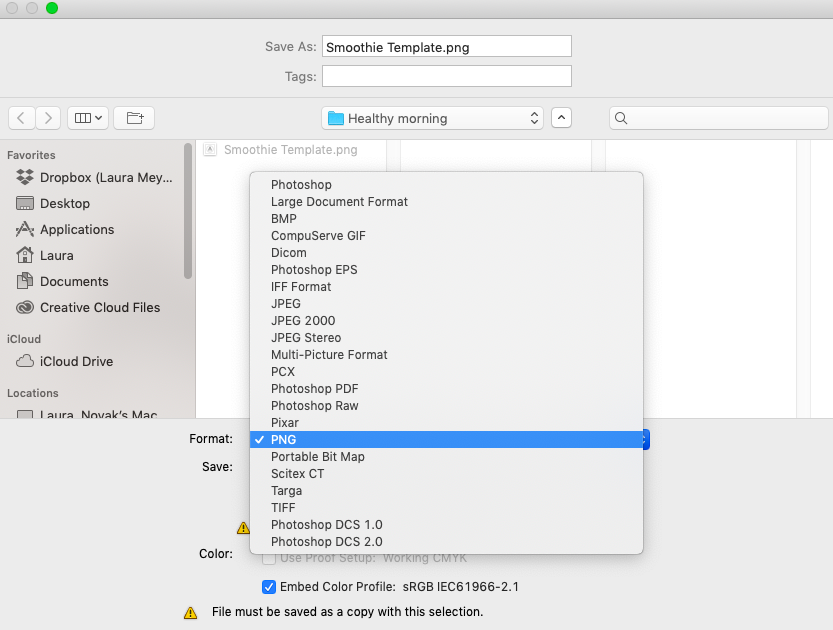
The big thing to keep in mind is that the file needs to export as a PNG with a transparent background. If you can’t do that, you can erase the negative space in the Cricut software, but it’s time consuming.
Begin by creating a new document about 3x3 inches and high resolution (250 ppi is great)
Begin by just typing one letter with the “type” tool. I used Montserrat font, but you can begin with anything.
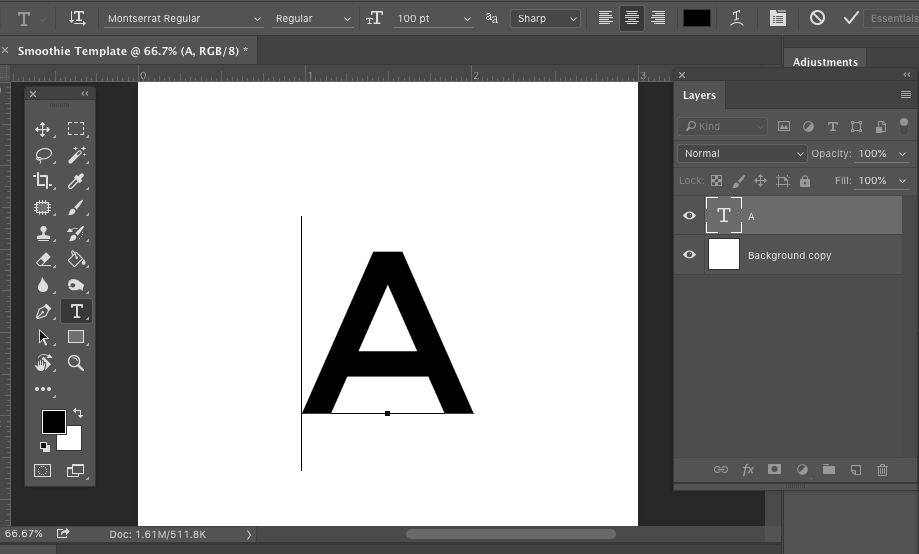
Then create a black line underneath using the shape tool, and estimate the size based on what you like best with your font.
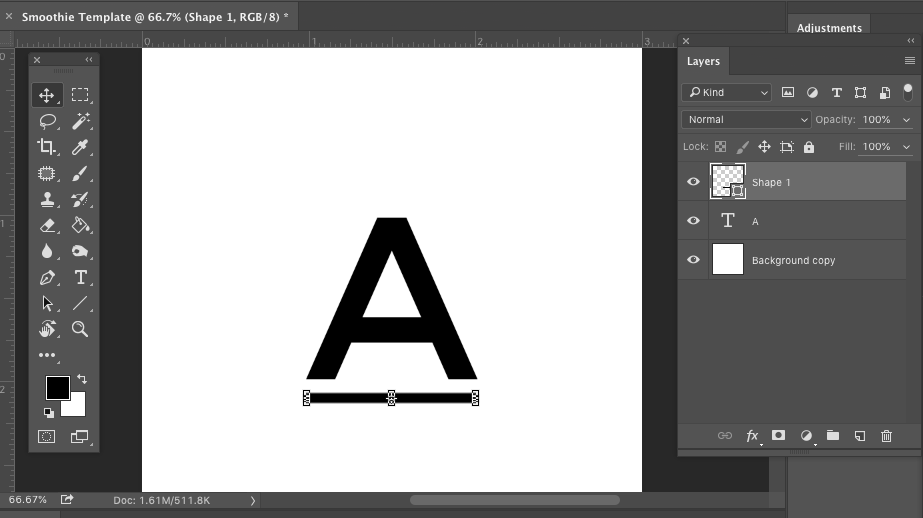
Next draw a circle shape about the same size as your line. On the top you can see the settings with no fill, and a stroke line of 15 px.
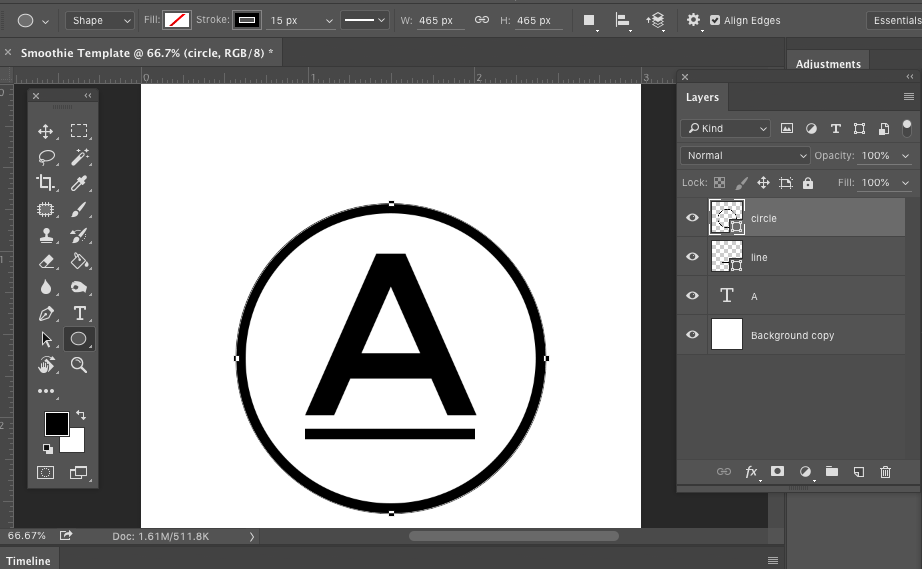
Drag the “background” to the trash so it becomes a transparent behind it. If it’s locked, create a copy by clicking on the background layer, dragging it to the “copy” icon (immediately to the left of the trash can), and then deleting the background layer that was once locked.
Duplicate the above steps for any additional letters you would like to print. This is what it should look like before you save it.
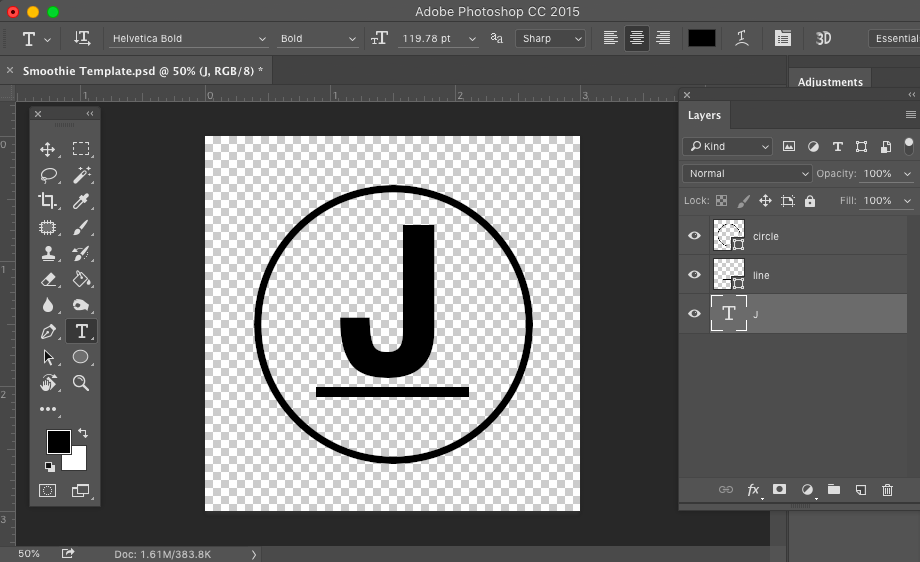
and then save it as a PNG!
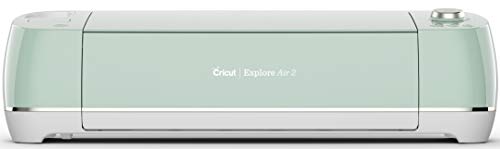
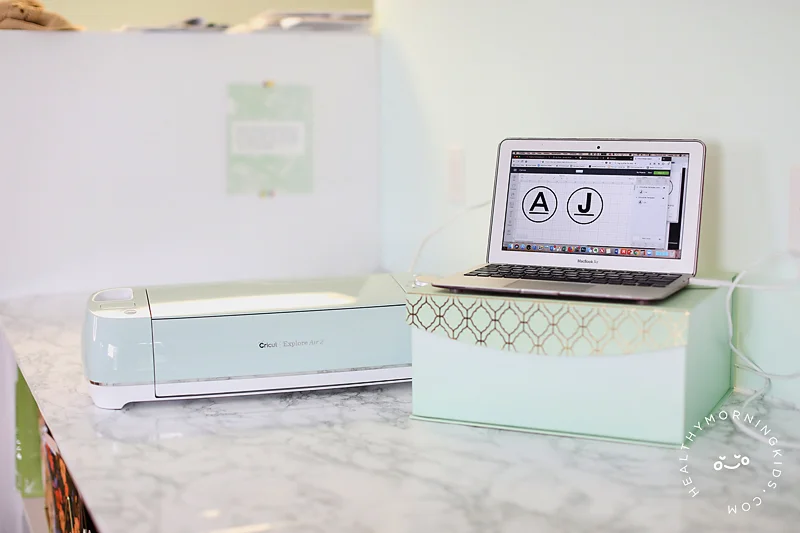
Congrats! Now you’re ready to move over to your Cricut. If you don’t have one, you can purchase the model I use, or find a friend with one and trade her a smoothie cup.
There seems to be one in every mom crowd!
But really, how cute is that blue?
I may or may not have painted my wall to match the Cricut.
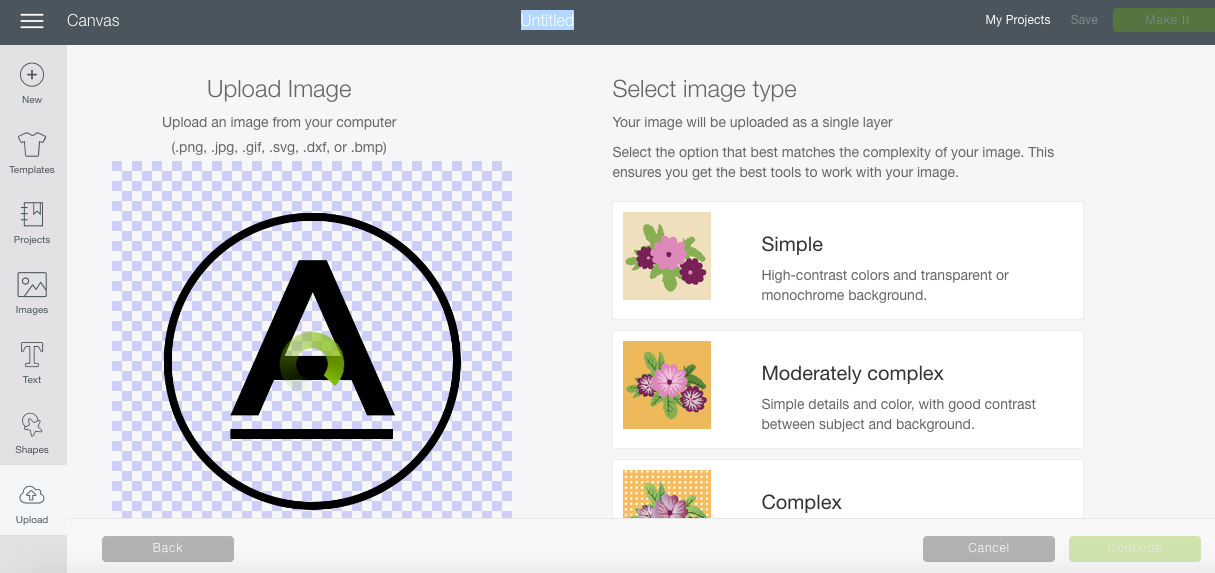
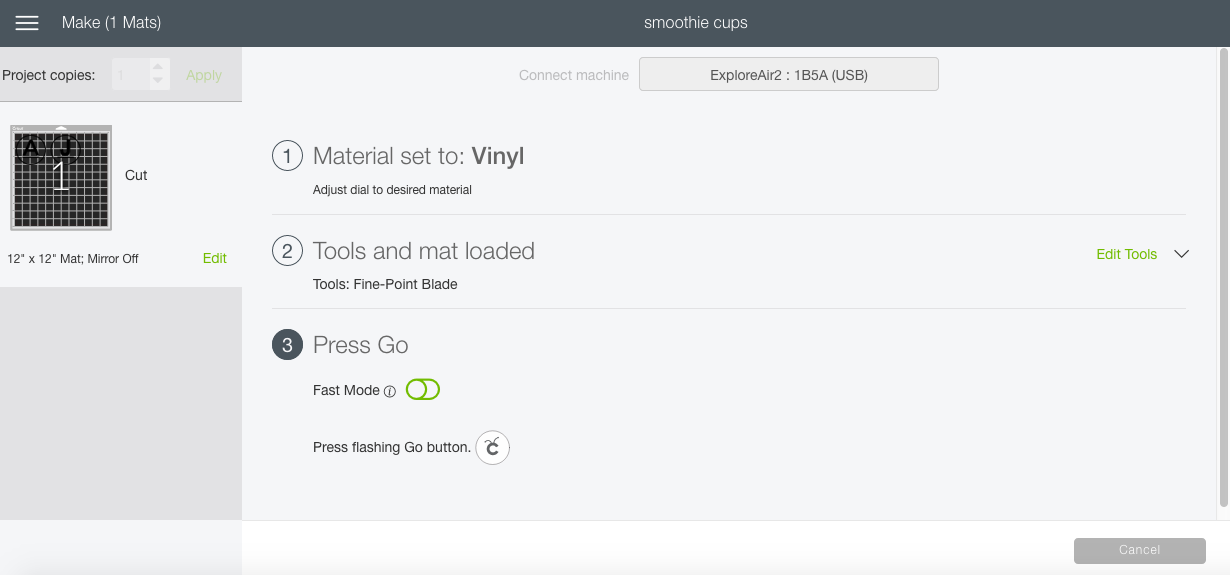
In your Cricut software, create a new project by uploading your graphics.
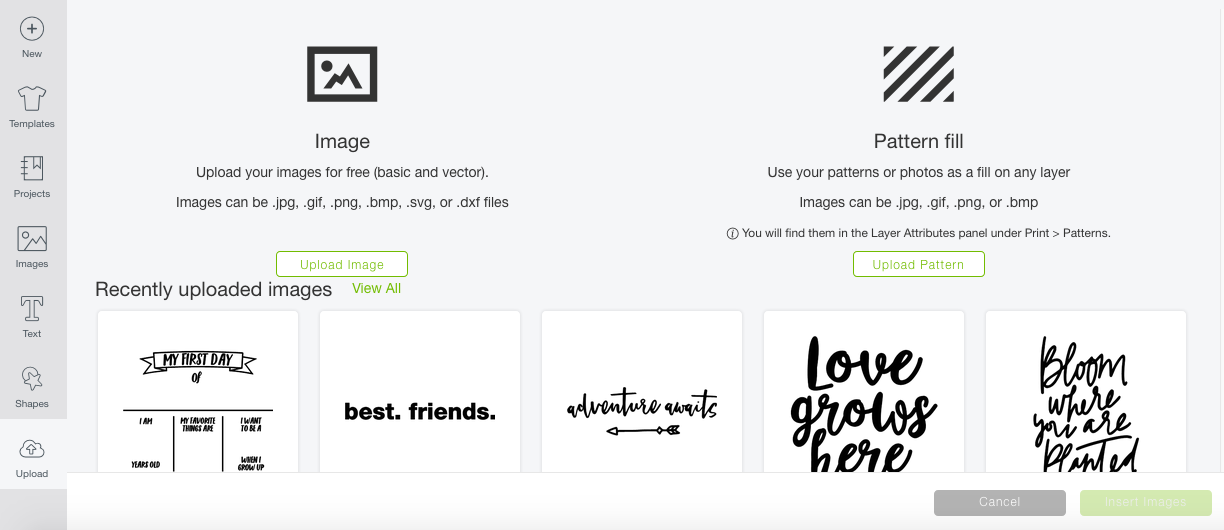
Choose the simple image option, and repeat for each letter you want to cut.
Almost ready for the most exciting part!

Insert images into your project and resize the images to the right size for your smoothie cup. For the ones I posted above, 2x2 is just about perfect!

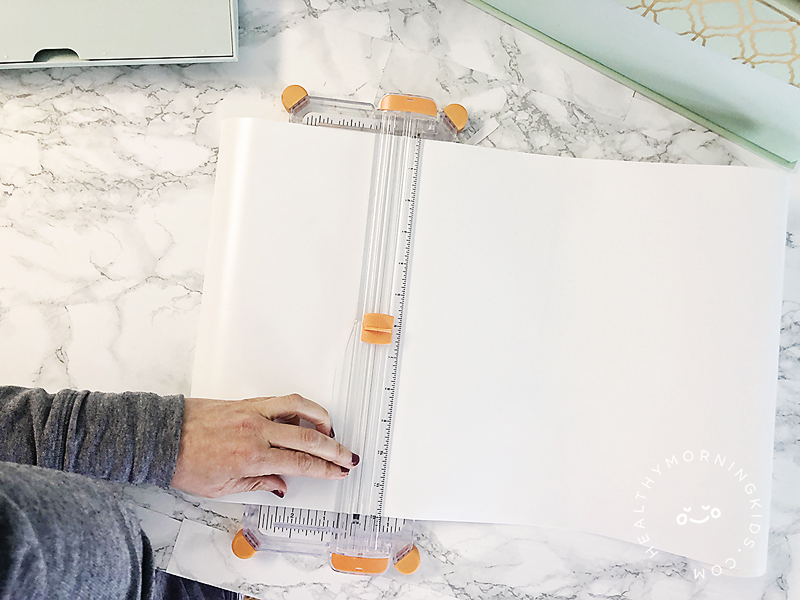
Now trim your vinyl to the right size. I like to use as little as possible, so I can reuse the rest of the roll for other projects.
And let the Cricut do it’s thing!
Almost there! Take out the “negative space” on the Vinyl to make it easy to transfer the decal to your smoothie cup with the transfer tape.

almost there! looks so good, right?

When lining up the decal on the smoothie cup, use the guidelines on the back of the transfer tape to ensure that your monogram is centered and straight. Oh! And if you’re going to photograph it, get a manicure. I forgot to do that part.

YES! Looks so good, right?
This was a pretty simple smoothie cup project minutes from start to finish, but if you’re new to Vinyl cutting or Photoshop, it might take a bit longer. If you want to skip the first part can also buy decals on Etsy really easily and inexpensively, just make sure that they are made from the permanent Vinyl so your smoothie cups can withstand daily washing.
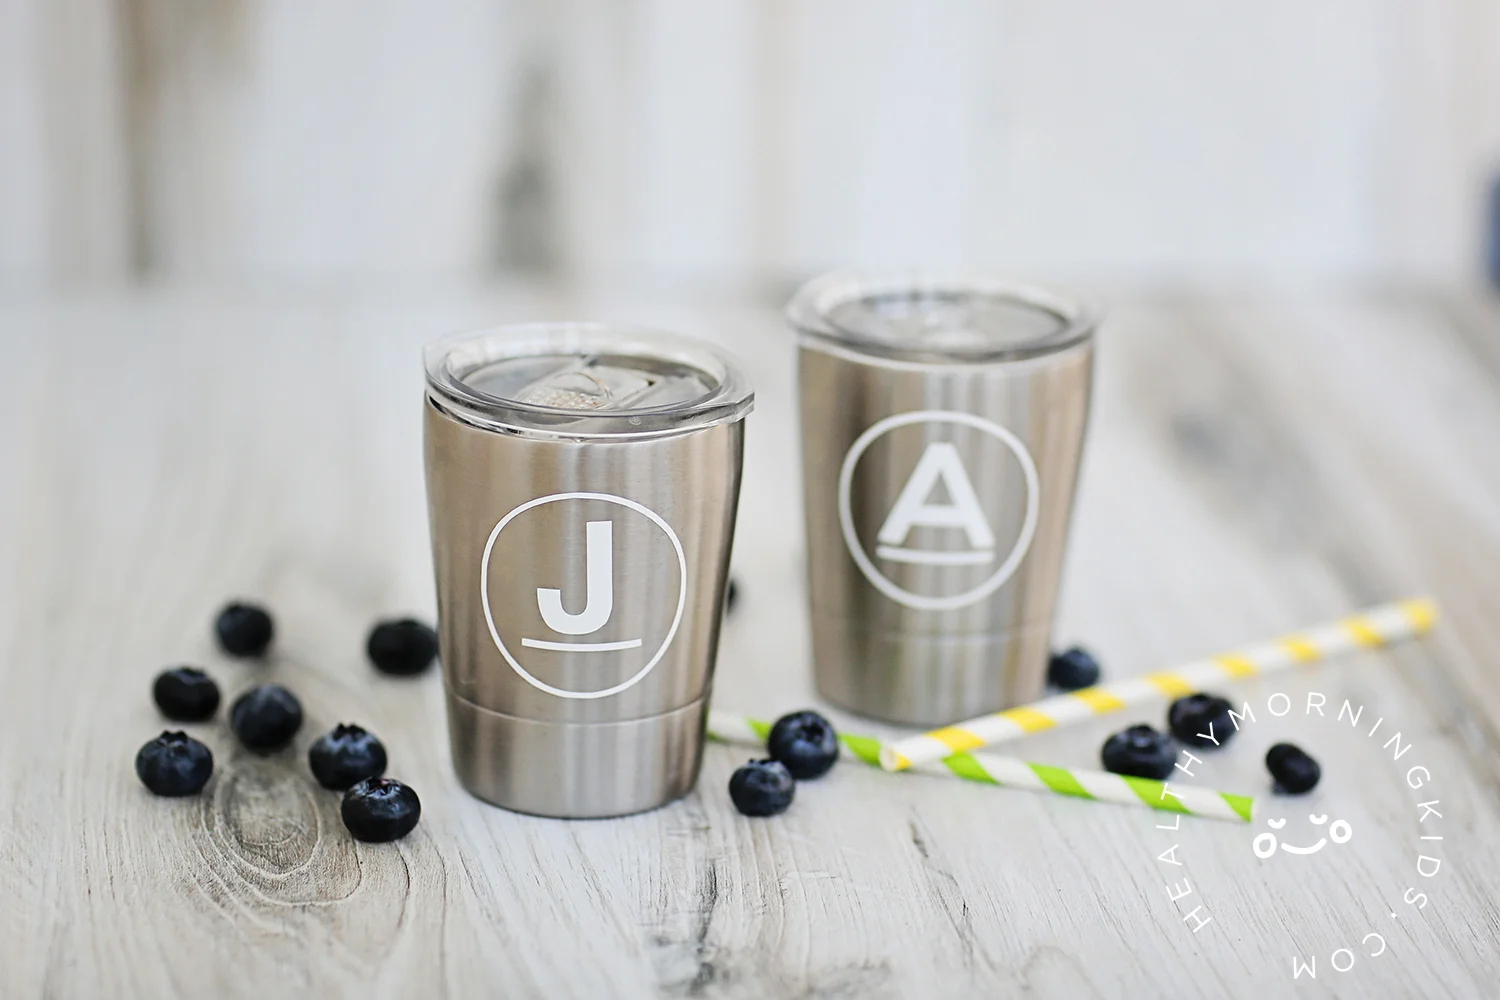
These have been a HUGE hit with my boys, and I hope your kids love them. It makes it so easy to grab their cup every morning, make a simple smoothie recipe, and watch that goodness get sucked right down.
Did you make these? How did it go! I’d love to hear from you!